Wednesday, December 20, 2006

Chipping Time Away...

"YAAAWWWNNN..."

It's late. I have pretty much finished texturing, at least to a point that is fair enough to start my rigging. I am planning on making a Cage of my model and all his extra's and using it to move my higher rez into pose. But before that here's an update as promised.

Tuesday, December 19, 2006

From One to Another...

The process of texturing I must amit is my least favorite part of modeling, but damn does it make the model look better when things are starting to go the way you want them. The other day I had an annoying problem were my displacement wouldn't show like this:


I spent over 8hours my my time that was needed to texture and rigg in trying to figure out why it wasn't working. For those that run into this problem I found that if you freeze your model and subdivided it at least twice it will do the trick. That is if you dont want to bring in a larger OBJ file of your model. My guess is that the computer just didn't have enough geometry in that area to comupt the information needed to render it.

But moving on. I thought I would share the point I am at in texturing. I am still wanting to do subserface lighting in the skin and tusk bones but at the moment I an unable to make that work properly. I only have a few things left to texture still though, those being the earings and the loincloth. I hope to have those done within a few hours and will post an updated image when I am finished that. But enough said here is my current state:


As you can see there are still some area's that need doing and tweeking. I really wish I had another week on this but insted I will have to hurry the texturing process so that it can make tomorrows 6:00pm due date. Which means I need to have a XSI that will allow me to rigg and render without any hassle.

Friday, December 15, 2006

Moving Along...

Moving along I have pretty much completed the alpha displacing using projecton master and will now clean up the body stucture and emphasize creases and wrinkles when needed. I will be soon importing the tusks and other clothing into Zbrush to add detail to them. There surface area is much smaller so I hope they will not take as long. I will then start texturing everything. But that is still a ways away.


And now back to work, but not after I grab something to eat ;)

Thursday, December 14, 2006

Heads Up

So I worked on the head a bit this morning for about 2hrs. I haven't used any alpha's yet to displace cause I am still in the molding stage, making sure everything is nice and pritty.


Now to life-drawing class.

Zbrush Happy

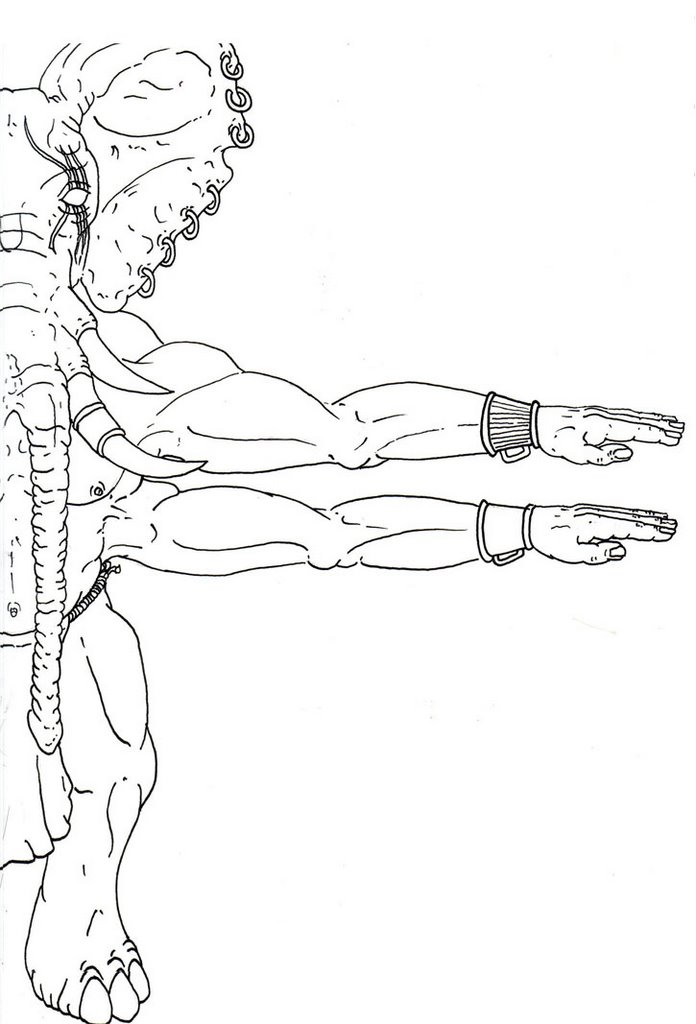
So after along time, that is about a weeks worth of unwrapping between work and other school projects I finally was able to attack it with Zbrush and go crazy with wrinkles which would be very difficult to do in XSI when in Zbrush it is a matter of a few brush strokes.

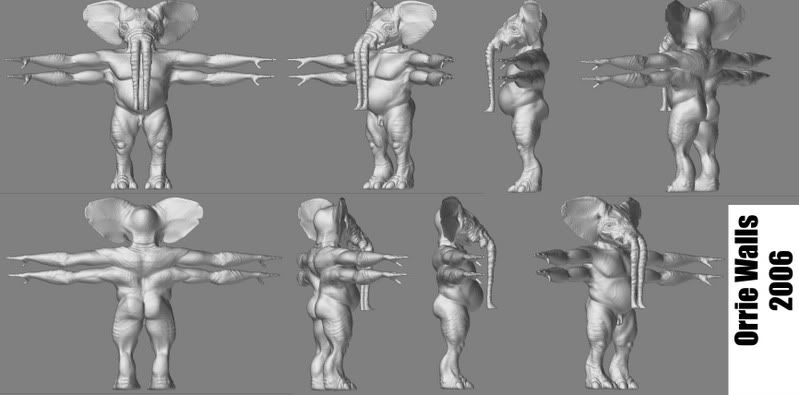
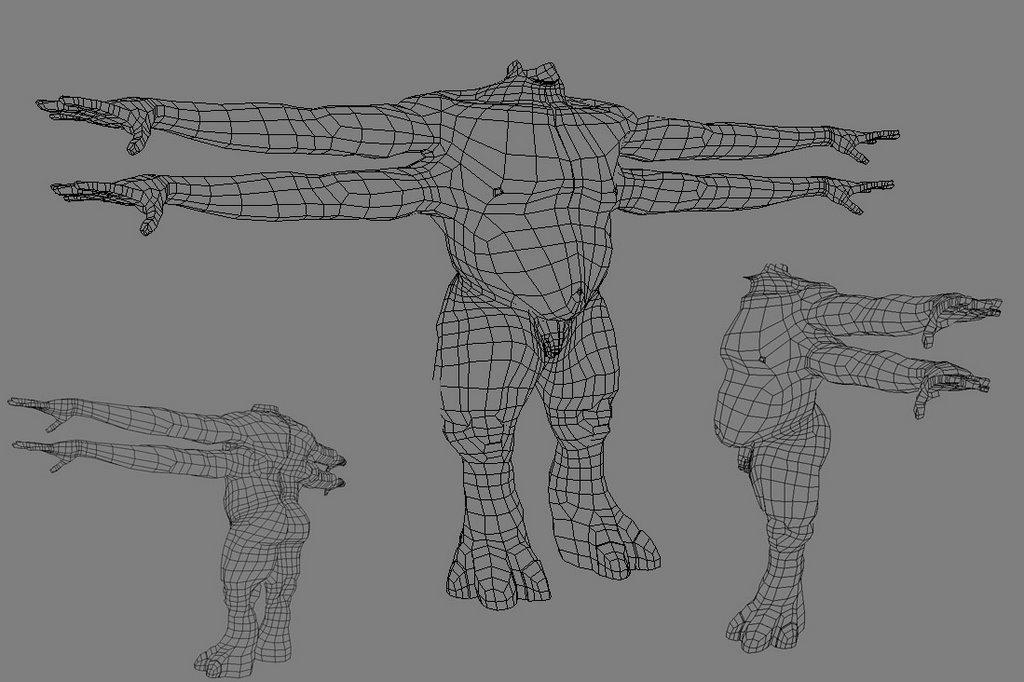
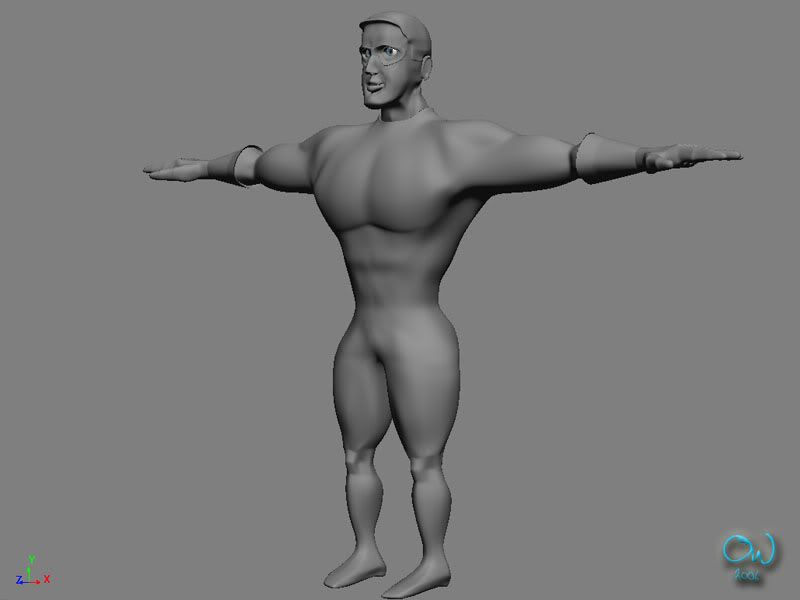
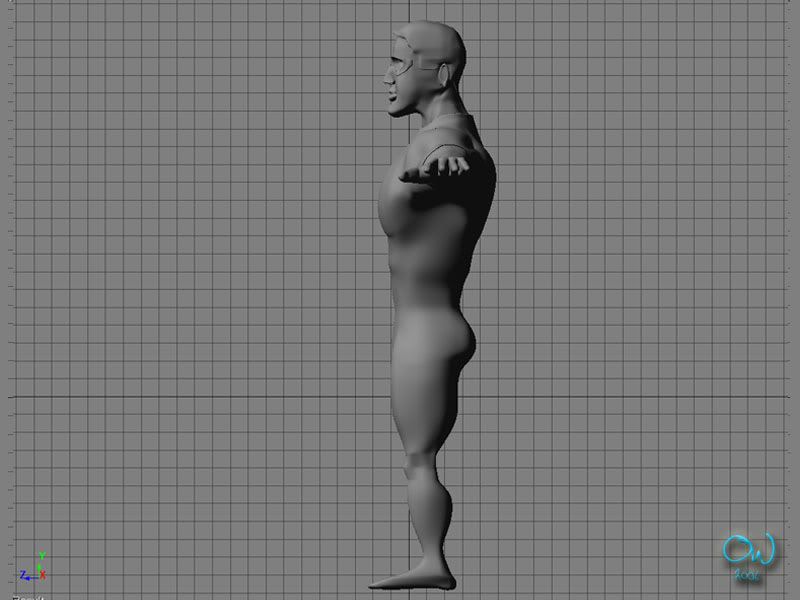
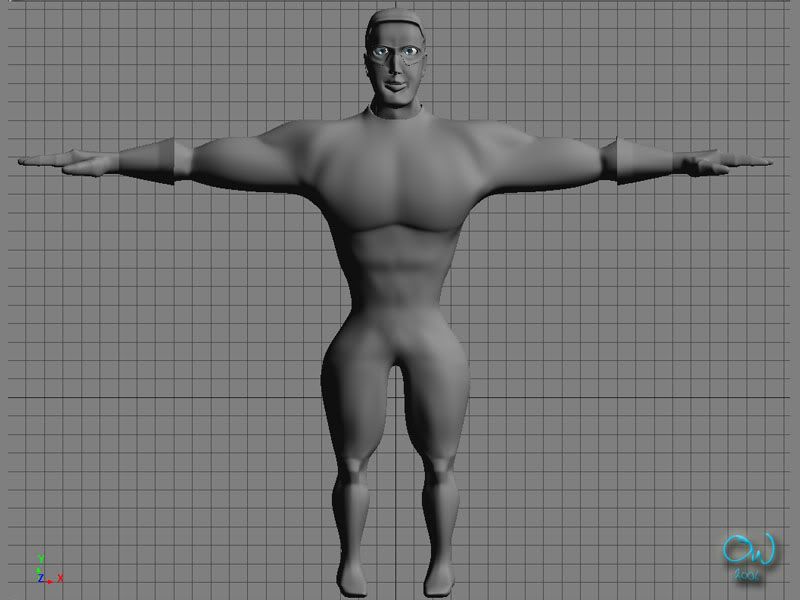
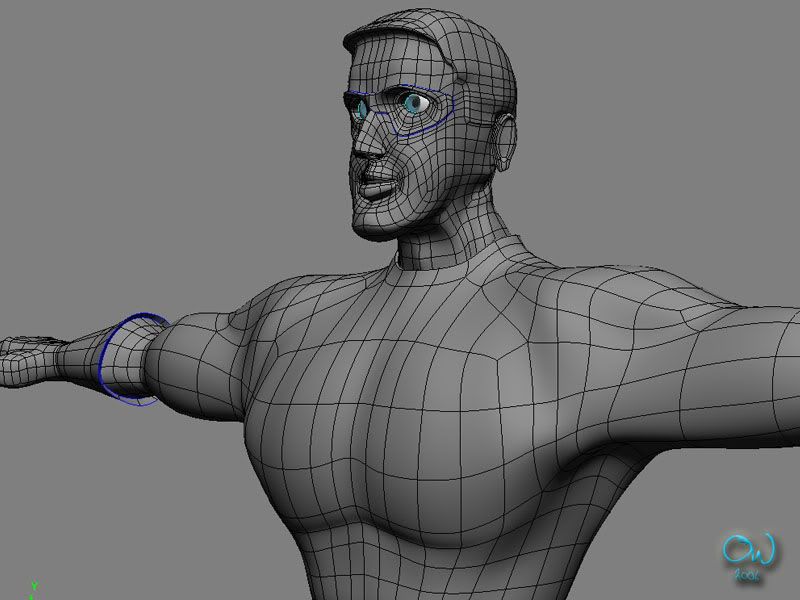
Anyways besides doing wrinkle detail I also sculpted out the bodies structor alot more giving Guishnu a more definded mucsel structure, viens, scars and other lovely things. Most of the detail you see I have done with just the standard brush. Inflating, smoothing, pinching, repeat... Working up through different subdivsions and going back and forward between then.

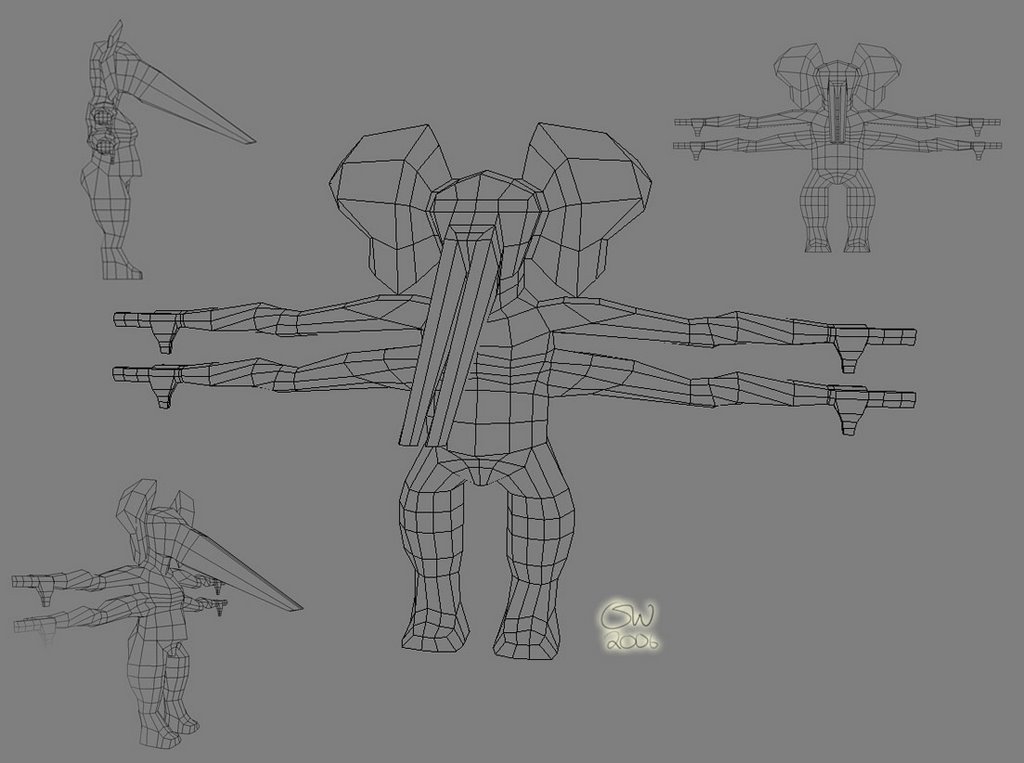
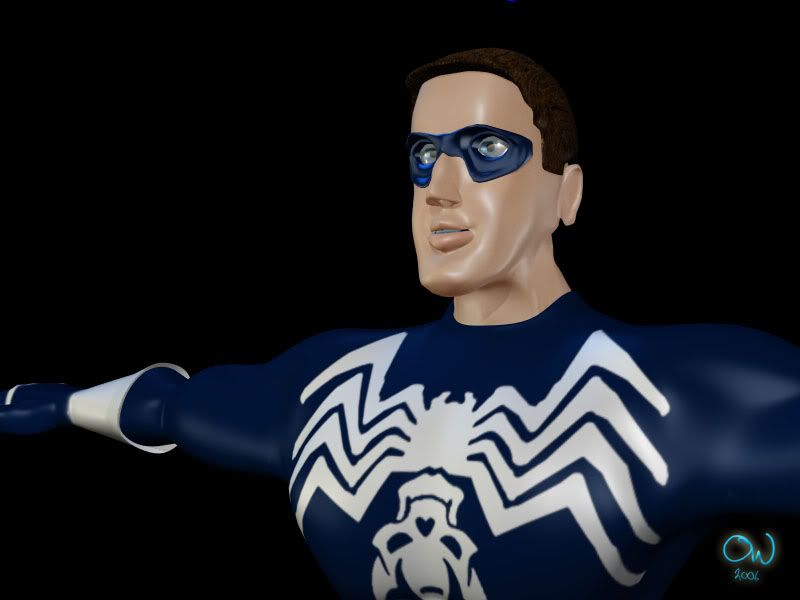
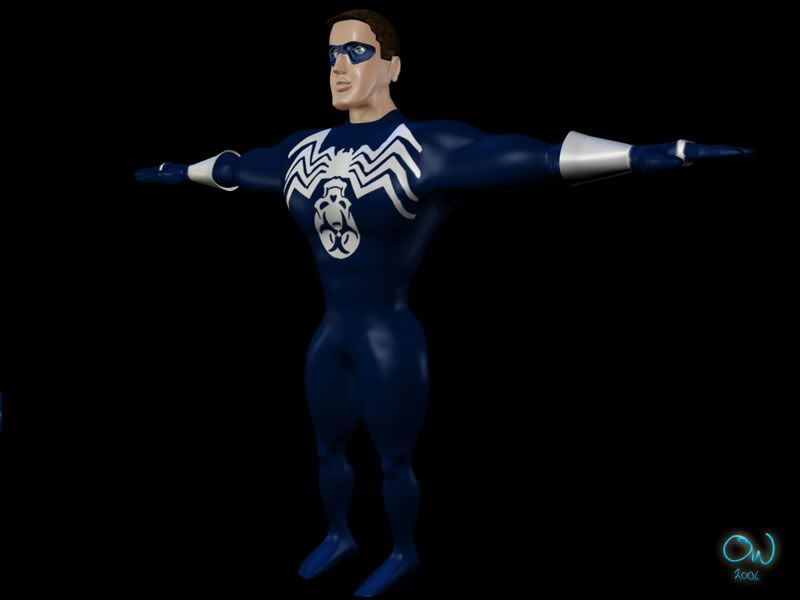
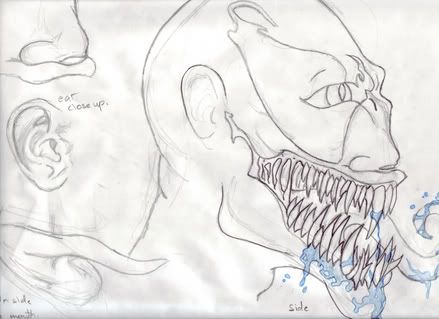
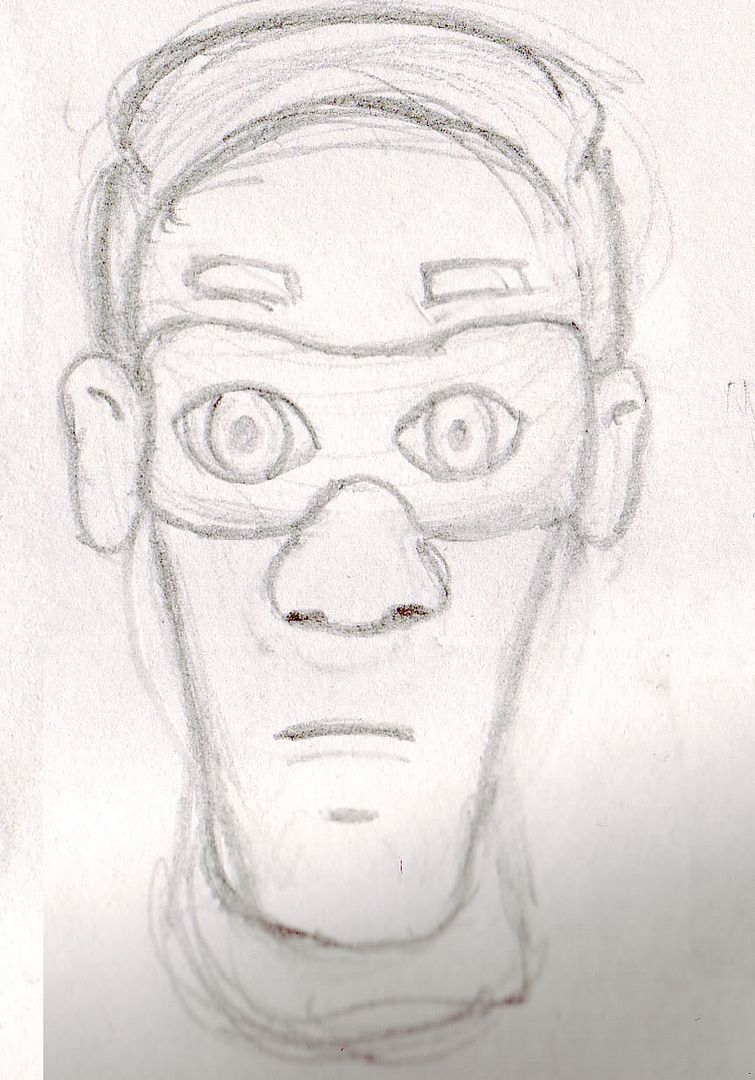
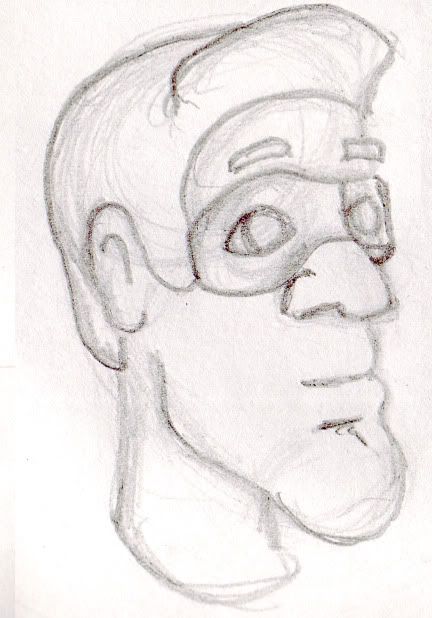
At this moment I am fairly happy with Guishnu's body and will be now focusing on his head. I will also be bringing in his bracers, tusks and such to add further detail to them but I am going to leave them until later.


I've got about 12 hours worth of detailing, texturing and rigging adead of me before I start rendering everything out. Which equals lack of sleep and care for ATL200 class.

Thursday, December 07, 2006

Guishnu as a Sculpture

I did this model before I even started working on my 3D project of Guishnu. In fact this is part 2 of what is to be 4 parts of a large project. First I started out with coming up with concept drawings of creatures I might want to do (see below in an older post for two examples). I then from those drawings created a 15.5 inchsculpture out of wire, tine foil, and sculpty (smothing way better then clay for the fact that it doesn't dry out). I then did it in 3D using XSI and will be attacking it with Zbrush.

I've posted below the progression that it took me to create the sculpture. (Click the imgae to see them in Higher Rez.)


Now back to some more homework :P

Tuesday, December 05, 2006

Thats it I'm Done! No more! Nata! Well... Ok Maybe.

Well I have finished my last hour and I have to say I am pretty happy with it myself and am earger to take it to the next level of detail in Zbrush. I believe this will be a strong base model and so now all I have to do is unwrap it :( I really don't like this part. Of all the things needed to do in modeling unwrapping is my least favorite.


"Yawn...." Well on wards for the glory of Auir! I will adventure to the school for my lab and start some major web-designing for ID.

One Hour Remaining

I've got one hour left and I will find myself finished the alotted time given me to build the base model in XSI for later on Zbrushing. So far what is new is all the jewlary is finished, I added an eye and fixed the geometry around the eye to fit the newly made eyeball. I further fixed the legs to make the edge loops flow more smoothly.


Any suggestions or for ever hold your peace for this project is comming to an end?

Thursday, November 30, 2006

10 Hours Gone 2 More to Go.

Ok I've cleaned up my geometry like Fransico suggested, making it flow more towards the mucel structure. I think I will further clean up the legs in the next few hours left. I've also made him his braclets and loin cloth and started on his necklace they were quite simple to make. I also did some detail work in the hands and around the eye. When I was doing the hadns I found out something that I didn't even notice when I first made them. I made 4 fingers, check the pictuer out he is supose to have 3.


Now to eat something and get ready for Jeff's class.

Wednesday, November 29, 2006

Drill Resaults

Here's my modeling resaults on that 3 hour head you had for us. I got pretty far, not as far as I wanted but fairly far. I'll have to get Nolan and Cassy to mark it and give you the mark for it next class or so.


Now back to making Guishnu look more cool :)

Tuesday, November 28, 2006

Heading in the Right Direction?

Well I've done what I was planning to get done. Go to the school and eat something :P I also duplicated the pace were the tusks come out and merged them. Merged the head to the body and defined the neck's structure and then made the trunk. I wasn't quite sure if I should have the trunk hanging down or strieght out for better rigging. I went with hanging down cause it looks better and fallowed my drawing.

Below I have added close ups on the head, since that was may main focus for this hour and then shots of the hole figure.


As said before I'll be spending my last three hours on detailing and making the jewlary, which made me think do you know any good tuts on cloth? I'm going to spend some time looking for open and practising to see if it will work. Otherwise I'll just model the cloth and fudge the deformations as best as I can when it comes time to pose the character.

One More Step Ahead...

Well I got rid of the trunk and added more edge loops. I also added an area for the tusks to come out of and will quickly duplicate them for the second pair. My next step will to merge the head to the model and work on the neck and trunk hopefully making a competele rough body that I'll have 3 more hours to do details and jewlary.


There will now be a pause in between while I walk to the school for a Lab and get some food.

Heads Up!

Ok I've moved on to focusing on the head. Here's what I got in an hour. I've posted my starting block to show the progression. I've added to the main features and blocked out others. I hope to have the area for the first set of tusks made here within the next hour, possibly the second while keeping everythign nice and round.


I'm thinking of getting rid of the trunk for now cause its getting in the way and I dont feel like shaping it as of yet.

Body Updating

Heres an update on exactly what I said I would probly have time for and that was making the legs look more proper. Look he now has toes and a knee cap! I also spend some time rounding out the character and adding some other detail.


I spent most of the morning practising the head and I will be now working on it. Their updates will be posted as the hours go past.

Sunday, November 26, 2006

And About 2hrs later...

Heres an update. I was just reminded that I was to update my progress every hour, oops... I'll do it every hour after this one.

Anyways... I extracted and hide the head and will work on it when I finish the three hours I alotted to the body tweaking. As you can see I added Edge Loops and fingers! At least a lot more then what I had before. Constently tweaking points to make sure everything is nice and round I added mucle formation and fat.


For the last hour I am planning to work on the leg more and add some toes. But I'll do that latter some time. Right now I'm going to practise the head cause damn they are hard. Speaking of practicing on a head I need to do another human head... Ah... so much lovly things to model and so little time to do to them.

Friday, November 24, 2006

Behold the Beast!

This is my most recent piece of work (I have other I still need to post but they will have to come later. I'll be posting my progress as it goes cause one of my 3D instructors needs us to so he can mark as we go. I have 12 hours to model this creature so that it is Zbrush ready. So far this is what I have done in 3hrs. It is a basic block model and I will add further edge loops as I continue to work on it.


But now off to see The Fountain :)

Thursday, October 19, 2006

Building blocks for buildings...

Ok... So its been over 3 months since I last updated this blog with stuff I that have worked on, and there has been a lot. Well like 4 more 3D models I have worked on and a couple of paintings I did in photoshop.

Getting on the the images below. My next assignment after the bunny machine was to make an architectural building. Myself have always loved Japanese castles and the way they looked and so I decided to model one.


The hardest part was scaling and making sure that every piece was the correct size. Even with like over 30 reference pictures the task of making the building look true to its design proved to be quite difficult. But I count myself lucky cause I was able to find a plastic model of the building at a model shop. Though it was small it proved to be very useful to help measure the height and width of everything that that it looked more correct then what it would have been without such a reference.

Thursday, August 10, 2006

Ra-Bit Slayer X-360

I started out the second year focusing on modeling, not animation, and with a mechanical mockery of 'Wallace and Gromit's' bunny sucking machine. For of those that dont know what I am talking about it is this machine for thier movie:


The goal was to make the model in the 'Wallace and Gromit' style but... I didn't want a machine that just sucked up little bunnies. I needed away to get rid of them and so I designed mine after a blender.

Ladies and Gentalmen I give you the Ra-Bit Slayer X-360!


Thursday, July 13, 2006

One rung at a time...

So about a month back Fransico said, "Your next assignment is this." We had to animate Stewie climbing up a ladder. The assignment objectives were to have Stewie climb up the ladder grab an object and then come down. Well... my mind was to obsessed as to how he was to climb up that when I modeled the ladder I made it Huge. Not a smart idea of a weeks worth of animation assignmnet but I did it anyways and it didn't turn out that bad. My only complaint is that the going down part is alittle long.

Tuesday, June 13, 2006

Damn that was heavey ;)

So my latest assignment was making Stewe, a pre-made character, lift up a heavy box. I in the end I decided to Toon Shade it, other known as Cell Shading. Next is making Stewe climb up a ladder.


Saturday, June 10, 2006

Superly Slow for Updating Blog...

Well I finished the body and attached the head over a month ago not to mention that I even textured it. I had two weeks in order to model the body and one week to texture. I remodeled the body 6 times until I got it the way I wanted and when I was finally finished my sixth I wanted to re-do it again but I didn't have time considering that I was working on the sixth version I was suppose to be texturing so... I might do it later.


Textureing was alittle fun. I'm not overly well versed in PhotoShop but I didn't think this was that bad. What was really annoying was unwrapping my character that was an experience in itself and given a "next-time" I am pretty sure I'll do better.


Tuesday, May 09, 2006

The Life of a Supper Hero...

So I start off this next semester with a new project, create my self as a super hero! This was going to be my first human model I ever had to work on and well... I clearly got excited. So much so that when I started my sketchs they didn't quite add up to what Fransico stated the character had to be based from.


See the main thing I forgot was that it was suppose to be in a "Incrediables" style... and well as you can see I was a little towards the Marvel Comic style insted of Pixar. So... I did a few more drawings focusing on the face because that is what we were going to model first.


As you can see I was on beter track after that. Know on to mobeling the head. This was pretty fun, I mean there was a giant learning curve and I like remade my head no more then 6 times but... I finally made one that I liked and looked pretty close to my drawing.


And ya... Now on to the body, that will be comming soon. (It's not easy being a hero.)

Sunday, April 23, 2006

Well I guess it just didn't want to work....

The movie I was trying to host is just not wanting to work, which in all truth sucks. But ya it was for all those noobs attending Boot-Camp at CATO, a short video that when through both my bike model and whale animation.

But hey, if I can get the movie host I'll post it on here. The good new was I was able to get it to Fransico through MSN. I guess Microsoft has some good points.

Monday, March 27, 2006

You'll just have to wait.

Fransico you'll have to wait until the damn video uploads. It is 99.somthing mbs and the max I can host is 100mbs so I'm cutting it short and because its size it will take a bit to upload. Peace :)

Monday, March 20, 2006

Hey its another Update, Could this be the last?

Ok I am getting sick of trying to animate these balls. The more I fiddle with them the more I wish I am modeling somthing cool. Like both animation and modeling but I think that I prefer modeling over animation. Who knows though, Fransico may change my mind when I start next summester, cause form what I remember seeing of the second years they get to do alot of modeling.

Ok on to the animation. I have tried everything that I can possible think of and spent hours trying to make each ball work how I want them to be. I have been stairing at this damn screen so long that I am pretty sure I am missing things that are wrong. Any ideas?

Sunday, March 19, 2006

Yes it is another Ball Update.

Ok I fixed a bunch of things like makign the red balls decent go faster and its bouncing down the stairs more ball like. I believe that I am pretty much done but then again this project is pretty hard.

Saturday, March 18, 2006

Hey what do you know another Update.

Ok the animation is comming along some what. I am still trying to make that damn fat ball look heavy. I have been messing around witht he F-Curves and dope sheet and still can't seem to get it the way I want it. It should have a little quick part going into the jump and then a fast fall... Ya its alittle annoying.

Ball Animation update.

Heres an update on my ball animation. I have pretty much timed out everything the way I want it and am now fooling around with the F-curves to try and make the fat ball's character seem heavey and fat and so on.

Friday, March 17, 2006

Ball Animation01

Here is the ball animation. Some of animation is off because I am currently working on the timeing.

My Bike Video

So ya at the begining of this term Fransico had us model a bike. Insted of just rotoscoping a picture from the net me and Chriss W. went out to Cyclepath and took like 50 pictures of a bike. This video is both a thankyou video to Cyclepath for letting us use their product, and a video to show what I have done.


PS. You'll probly not be able to read the text and the video may play really fast in part because I had to compress it and the compressor I used was annoying in the fact it took curtain areas speed them up.

Tuesday, March 14, 2006

Whale FIN!

Hey the whale is finished. So ya here it is, oh and you may want to fast-forward through the 10sec of black screen and turn on your speakers because there is sound.

Friday, March 10, 2006

Ah... Never mind.

Never mind I figured it out and I seem to be talking to myself which is fine. I needed to republish my who blog to make it visiable for the public. Sorry Fransico if you did not get to see my whale on the date that you set. I am pretty sure now that it is visible and should be able to be viewed.

Is it me or does my blog not like me?

This is totally screwy. I made a post on tuesday called "Good Morning Fransico" and to my knowledge it was posted. But when I checked to day it was not posted. Yet in my Edit posts section it was right there and when I clicked on it it asked if I would like to publish it. I clicked yes and it appears that it is up again. Sorry if it was missed.

Tuesday, March 07, 2006

Good Morning Fransico!

Whats up, here is the short whale video you wanted. If the link is not working for you then I well email it to you.


Me and Windsor were able to figure out a bit of the lighting stuff but it still is not as good as this:


click above for movie.


I'll ask Gram when I get the chance, but for now it looks pretty good and murky :) At least that is my opinion, thought it is a pain in the ass to render. Have fun in nice warm Mexico :P